In this page
Writing a Web App from scratch
This page serves as a end-to-end example project for the JavaScript bindings of GreyCat with an emphasis on Web development.
For the complete documentation of the library
@greycat/web, read the dedicated documentation.
Requirements
This tutorial requires:
- Node.js (>= 18)
npm(orpnpm,yarnor any JavaScript package manager)- Any recent Chromium-based browser, Firefox or Safari.
- GreyCat 6.5+ (see Setup)
Setup
To get started, lets ensure that GreyCat is installed globally:
curl -fsSL https://get.greycat.io/install.sh | bash
This tutorial assumes the host machine’s OS is Linux or MacOS. For the Windows installation, follow the instructions at https://get.greycat.io and adapt the different commands to a Windows environment.
Using a template
As stated in the documentation, we provide templates to get you started easily with Web projects.
Lets scaffold our project by cloning template/web:
git clone git@github.com:datathings/greycat-template-web.git sensors-project
This will clone the template into a newly created directory:
sensors-project
Once the project is cloned, move into it and install the required dependencies:
cd sensors-project
pnpm install
This template comes with everything setup for a good Web development experience.
.
├── backend
│   └── ...   # GreyCat Server files
├── frontend
│   └── ...   # TypeScript files
├── ...       # Project-level configuration files
Clean the examples
The template we cloned is good for new-comers as it comes with several examples to get started with GreyCat.
For the purpose of this tutorial, we won’t need them as we will create everything we need from scratch iteratively.
For this reason, we are going to clean the unecessary files/directories:
rm -rf backend/src/hello.gcl backend/test/hello.test.gcl Dockerfile frontend/pages/about frontend/pages/protected frontend/pages/table install.sh
We also need to update the Vite bundler configuration file vite.config.ts to comply with the deleted pages.
For this, locate the build.rollupOptions.input object, and delete all entries but index:
// ...
export default defineConfig(({ mode }) => {
  return {
    // ...
    build: {
      // ...
      rollupOptions: {
        input: {
          index: resolve(__dirname, 'frontend/pages/index.html'),
          // <-- we've deleted all pages but 'index'
        },
      },
    },
  };
});
// ...
And finally, replace the content of the frontend/components/app-layout.tsx with the following:
import { logout } from '@greycat/web';
import LogoutIcon from '@tabler/icons/logout.svg?raw';
import BrightnessUpIcon from '@tabler/icons/brightness-up.svg?raw';
import MoonIcon from '@tabler/icons/moon.svg?raw';
import HomeIcon from '@tabler/icons/home.svg?raw';
import LogoIcon from './logo.svg?raw';
import { icon } from '../../common/utils';
import { APP_LAYOUT_THEME } from '../../common/constants';
import './app-layout.css';

/**
 * Make sure to append this component to the DOM **after** GreyCat is initialized
 */
export class AppLayout extends HTMLElement {
  readonly main = document.createElement('main');

  /**
   * Relative path to parent page
   */
  get parent() {
    return this.getAttribute('parent') ?? '.';
  }

  set parent(parent: string) {
    this.setAttribute('parent', parent);
  }

  /**
   * Name of current page
   */
  get current() {
    return this.getAttribute('current') ?? 'index';
  }

  set current(current: string) {
    this.setAttribute('current', current);
  }

  connectedCallback() {
    const lightIcon = icon(BrightnessUpIcon);
    const darkIcon = icon(MoonIcon);
    const initialTheme = getCurrentTheme();

    const themeIcon = {
      dark: lightIcon,
      light: darkIcon,
    };

    function toggleTheme() {
      const curTheme = getCurrentTheme();
      const newTheme = curTheme === 'dark' ? 'light' : 'dark';
      toggleThemeBtn.replaceChildren(themeIcon[newTheme]);
      setCurrentTheme(newTheme);
      // remove focus after update
      toggleThemeBtn.blur();
    }

    const toggleThemeBtn = (
      <button role="link" onclick={toggleTheme}>
        {initialTheme === 'dark' ? lightIcon : darkIcon}
      </button>
    ) as HTMLButtonElement;

    const parent = this.parent;
    const current = this.current;

    this.appendChild(
      <aside>
        <nav>
          <ul>
            <li className="brand">
              <a href={parent}>{icon(LogoIcon)}</a>
            </li>
            <li>
              <a
                className={current === 'index' ? 'active' : undefined}
                href={parent}
                data-tooltip="Index"
                data-placement="right"
              >
                {icon(HomeIcon)}
              </a>
            </li>
          </ul>

          <ul>
            <li>{toggleThemeBtn}</li>
            <li>
              <button
                role="link"
                onclick={this.signout}
                data-tooltip="Logout"
                data-placement="right"
              >
                {icon(LogoutIcon)}
              </button>
            </li>
          </ul>
        </nav>
      </aside>,
    );

    this.appendChild(this.main);
  }

  disconnectedCallback() {
    this.replaceChildren();
  }

  async signout() {
    await logout();
    location.reload();
  }
}

function getCurrentTheme(): 'dark' | 'light' {
  let theme = localStorage.getItem(APP_LAYOUT_THEME);
  if (theme === 'dark' || theme === 'light') {
    document.documentElement.setAttribute('data-theme', theme);
    return theme;
  }

  theme = document.documentElement.getAttribute('data-theme') ?? 'dark';
  if (theme === 'light') {
    return 'light';
  }
  return 'dark';
}

function setCurrentTheme(theme: 'dark' | 'light') {
  localStorage.setItem(APP_LAYOUT_THEME, theme);
  document.documentElement.setAttribute('data-theme', theme);
}

declare global {
  interface HTMLElementTagNameMap {
    'app-layout': AppLayout;
  }

  namespace JSX {
    interface IntrinsicElements {
      'app-layout': GreyCat.Element<AppLayout>;
    }
  }
}

if (!customElements.get('app-layout')) {
  customElements.define('app-layout', AppLayout);
}
Now that the project setup is done, we can start discussing the project’s goals.
Backend development
In this section we are going to write the server part of the project composed of:
- modeling the domain
- writing CSV importers
If you want to skip to the Frontend development directly, you can download the backend part of the project and follow from there.
This zip contains all the GreyCat files and .csv for the backend part to work. It is the equivalent of following all the steps in this section.
Defining the project’s domain
The goal of this project is to visualize sensors data coming from a GreyCat server into a Web application.
Lets pretend that the sensors data is coming from an external 3rd-party server under the form of CSV files, but for the sake of this tutorial
those files are going to be already available as static files.
Although periodically fetching external files and importing them into GreyCat is interesting and totally doable, it is out of scope for this tutorial.
The focus being on displaying data with@greycat/webrather than importing data.
To envision more what the data looks like, let’s show an excerpt:
SensorID,Latitude,Longitude,Type,Value,Timestamp
1,48.8566,2.3522,Temperature,23.5,2023-11-14T12:00:00
2,51.5074,-0.1278,Humidity,65.2,2023-11-14T12:05:00
3,49.6116,6.1319,Pressure,1012.3,2023-11-14T12:10:00
...
2,51.5074,-0.1278,CO2 Level,435,2023-11-14T20:05:00
3,49.6116,6.1319,Temperature,23.3,2023-11-14T20:10:00
4,59.9139,10.7522,Humidity,61.0,2023-11-14T20:15:00
The complete file is available to download here: sensors.csv
Download the file and add it at the root of the project in: data/sensors.csv.
Here’s a one-liner to do it:
mkdir -p data && wget http://localhost:3000/sdk/web/assets/sensors.csv -O data/sensors.csv
Model the data
Looking back at the data/sensors.csv file, we see that we have:
| Column Name | Description |
|---|---|
SensorID |
an int |
Latitude |
a float |
Longitude |
a float |
Type |
a kind of sensor from the following list: Temperature, Humidity, Light Intensity |
Value |
the actual value provided by the sensor as a float |
Timestamp |
a normalized UTC datetime that we are going to map as a time |
This translates almost 1:1 to GreyCat’s type system, so lets create a file in order to write our types:
# create a dedicated directory
mkdir -p backend/src/model

# create a file for the types
touch backend/src/model/sensors.gcl
Then in backend/src/model/sensors.gcl paste the following:
type Sensor {
    /// Maps to `SensorID`
    id: int;

    /// Maps to `Latitude` and `Longitude`
    location: geo;

    /// Maps `Type=Temperature`, `Value`, `Timestamp`
    temperature: nodeTime<float>;
    /// Maps `Type=Humidity`, `Value`, `Timestamp`
    humidity: nodeTime<float>;
    /// Maps `Type=Light Intensity`, `Value`, `Timestamp`
    light: nodeTime<float>;
}
We create a Sensor type that contains timeseries for every possible types: temperature, humidity and light.
Now that we have our model setup, we can write an importer.
Import the data
In order to import the data, we need to import it somewhere, that somewhere will be a nodeIndex named sensors that will keep track of all the project sensors.
Lets open the project.gcl file at the root of the sensors-demo directory and write the following:
@include("backend/src");

use io;
use sensors;

var sensors: nodeIndex<int, Sensor>?;

var imported: bool?;

fn main() {
  sensors ?= nodeIndex<int, Sensor>::new();

  if (imported == null) {
    var format = CsvFormat {
      header_lines: 1,
      columns: [
        CsvColumnInteger { name: "SensorID", mandatory: true },
        CsvColumnFloat { name: "Latitude", mandatory: true },
        CsvColumnFloat { name: "Longitude", mandatory: true },
        CsvColumnString { name: "Type", mandatory: true, values: ["Temperature", "Humidity", "Light Intensity"] },
        CsvColumnFloat { name: "Value", mandatory: true },
        CsvColumnDate { name: "Timestamp", mandatory: true },
      ],
    };

    var reader = CsvReader::new("data/sensors.csv", format);
    while (reader.available() > 0) {
      var line = reader.read();
      var id = line[0] as int;
      var location = geo::new(line[1] as float, line[2] as float);
      var ty = line[3] as String;
      var value = line[4] as float;
      var timestamp = (line[5] as Date).toTime();

      var sensor = sensors.get(id) ?? sensors.set(id, Sensor {
        id: id,
        location: location,
        temperature: nodeTime<float>::new(),
        humidity: nodeTime<float>::new(),
        light: nodeTime<float>::new(),
      });
      // fill appropriate serie based on 'Type' column
      if (ty == "Temperature") {
        sensor.temperature.setAt(timestamp, value);
      } else if (ty == "Humidity") {
        // get or create sensor based on id
        sensor.humidity.setAt(timestamp, value);
      } else {
        // get or create sensor based on id
        sensor.light.setAt(timestamp, value);
      }
    }

    imported = true;
  }
}
What we did is we ensured that everytime the server is started, GreyCat will create our index (if needed) and if imported is null then will proceed to import the data from the CSV file.
In order to ensure a certain level of type safety, we defined a CsvFormat that complies with our sensors.csv file.
Then comes the actual iteration of the lines in the CSV file by leveraging CsvReader.
You can refer to Features > CSV to get more insight into how CSV importers work in GreyCat.
Finally, we retrieve a Sensor instance from our sensors index, or we create a new one if none. And based on the ‘Type’ column, we fill the proper timeserie with the value and timestamp.
There we have it, our sensors.csv is imported in our GreyCat graph, and we can now query it.
Create an API
In order to create an API in GreyCat, we only need to create functions that we @expose. Lets do this.
The only API we need for our project is a way to get the list of available sensors.
This is done quite easily by returning an Array<Sensor>:
// in project.gcl

@expose
fn sensors(): Array<Sensor> {
  var result: Array<Sensor> = [];
  for (_, sensor in sensors?) {
    result.add(sensor);
  }
  return result;
}
Moving on to the frontend part.
Frontend development
From GCL to TypeScript
GreyCat comes with its own code generator to allow type-safe access of types, enums and @exposed functions from TypeScript/JavaScript.
For us to be able to use the Sensor type in the front and the @exposed function sensors(), we will need to actually generate the TypeScript code associated to it. For this, the template we cloned at the beginning comes with a script already setup:
pnpm gen
This will auto-generate a frontend/common/project/index.ts file based on your project modules.
Prepare the Web page
Reset the content of the frontend/pages/index/app-home.tsx file to:
export class AppHome extends HTMLElement {
  async connectedCallback() {
    this.appendChild(<div className="container-fluid">Hello world</div>);
  }

  disconnectedCallback() {
    this.replaceChildren();
  }
}

declare global {
  interface HTMLElementTagNameMap {
    'app-home': AppHome;
  }

  namespace JSX {
    interface IntrinsicElements {
      'app-home': GreyCat.Element<AppHome>;
    }
  }
}

if (!customElements.get('app-home')) {
  customElements.define('app-home', AppHome);
}
This is our home page, which is the one that will show up by default in the browser when accessing the root URL.
Start GreyCat in serve mode
Let’s start our GreyCat server in serve mode, so that it can answer queries:
greycat serve --user=1
--user=1means that every requests are impersonated to be therootuser, effectively bypassing authentication as this is out of the scope of this tutorial.
In another terminal now we will start our Web development server. This server will do 2 things:
- hot-reload the Web page when a changes happen in a TypeScript file
- proxy the API requests to our actual GreyCat server
pnpm dev
We can now open our favorite browser, and go to: http://localhost:5173
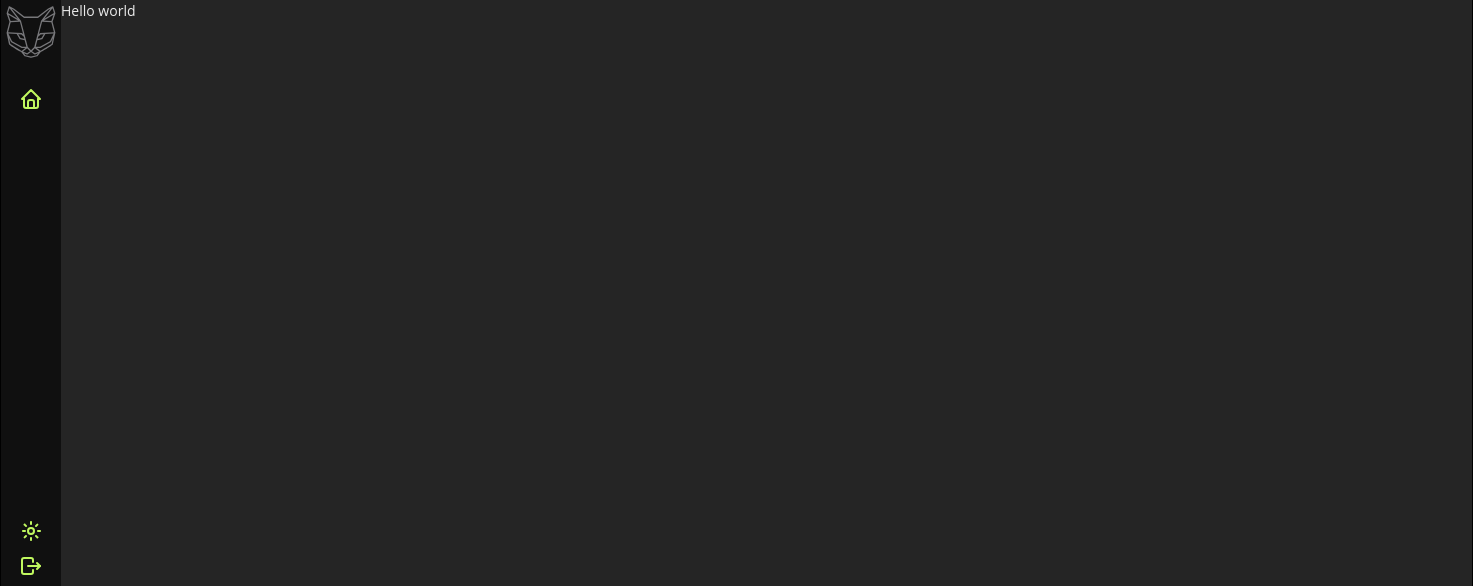
You should be greeted with an “Hello world” message:

Display the sensors as-is
When quick prototyping Web applications, you often just want to see what’s inside the response you get from the server. For this we’ve created two different Web component:
gui-valuewhich is going to print any given value as a stringgui-objectwhich is a more involved printer, that actually knows how to display complex data structures
To get started with our sensors list, we are going to display them using <gui-object />. In frontend/pages/index/app-home.tsx, replace the connectedCallback method with the following:
import { prettyError } from '@greycat/web';
import { project } from '../../common/project';

export class AppHome extends HTMLElement {

  async connectedCallback() {
    try {
      const sensors = await project.sensors();
      this.appendChild(
        <div className="container-fluid">
          <gui-object value={sensors} />
        </div>,
      );
    } catch (err) {
      console.error(err);
      this.appendChild(<>{prettyError(err, 'something went wrong')}</>);
    }
  }
  // ...
}
Notice the 2 new
importstatements at the beginning.
That’s a lot to unpack, so let’s to do it step by step:
- first, we’ve added the necessary
imports that the beginning of the file - then, we wrapped the whole
connectedCallbackmethod, into atry/catchstatement The reason for this, is because we made afetchrequest to our GreyCat backend. This is a failure point and therefore, we properly handle the potential error case. - finally, we leverage
<gui-object />to display the content of thesensorsvariable
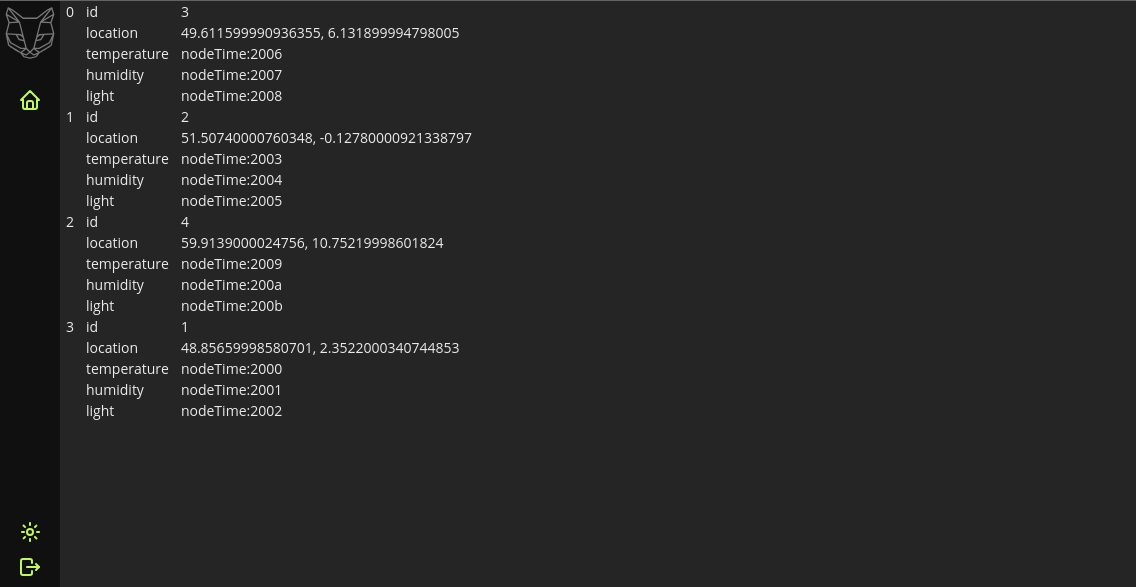
Once the change is made, save the file, and the browser should reload with the content of the sensors:

This is handy, but not ideal in our case. We can see our 4 sensors, but we actually would like to see the different captors data in, say, a table.
Display the timeseries in a table
As said before, <gui-object /> is good for prototyping, or displaying scalar values or POJOs, but when it comes to timeseries, often times, you want them to be displayed in a table containing 2 columns, one for the time and one for the value.
This is why every node type in GreyCat (nodeTime, nodeList, nodeIndex and nodeGeo) can be sampled to return a Table.
And because the Table type is in the std library, we also made a Web Component that knows how to display it.
Therefore, we are going to remove <gui-object /> from the AppHome component, and make a dedicated Web Component for displaying sensors.
Lets prepare the work in AppHome first, update the content of the file with the following:
import { prettyError } from '@greycat/web';
import { project } from '../../common/project';
import './app-sensor';

export class AppHome extends HTMLElement {
  async connectedCallback() {
    try {
      const sensors = await project.sensors();
      this.appendChild(
        <div role="list" className="container-fluid">
          {sensors.map((sensor) => <app-sensor sensor={sensor} />)}
        </div>,
      );
    } catch (err) {
      console.error(err);
      this.appendChild(<>{prettyError(err, 'something went wrong')}</>);
    }
  }

  disconnectedCallback() {
    this.replaceChildren();
  }
}

declare global {
  interface HTMLElementTagNameMap {
    'app-home': AppHome;
  }

  namespace JSX {
    interface IntrinsicElements {
      'app-home': GreyCat.Element<AppHome>;
    }
  }
}

if (!customElements.get('app-home')) {
  customElements.define('app-home', AppHome);
}
Instead of displaying the sensors variable using a <gui-object /> we are going to iterate over the sensors, and for each entry, create a Web Component called <app-sensor /> to which we give a reference to the sensor.
This means that we need to add another file frontend/pages/index/app-sensor.tsx with the following content:
import { core, prettyError } from '@greycat/web';
import { sensors } from '../../common/project';
import s from './app-sensor.module.css';

export class AppSensor extends HTMLElement {
  private _sensor!: sensors.Sensor;
  private _header: HTMLElement;
  private _content: HTMLElement;

  constructor() {
    super();

    this._header = document.createElement('header');
    this._header.textContent = 'Default title';

    this._content = document.createElement('div');
    this._content.className = s.content;
  }

  connectedCallback() {
    this.replaceChildren(
      <article>
        {this._header}
        {this._content}
      </article>,
    );
  }

  disconnectedCallback() {
    this.replaceChildren();
  }

  set sensor(sensor: sensors.Sensor) {
    this._sensor = sensor;
    this.update();
  }

  async update(): Promise<void> {
    this._header.textContent = `Sensor #${this._sensor.id}`;

    try {
      const temperature = await core.nodeTime.sample(
        [this._sensor.temperature],
        null,
        null,
        100,
        core.SamplingMode.dense(),
        null,
        null,
      );
      this._content.replaceChildren(<gui-table table={temperature} headers={['Timestamp', 'Temperature']} />);
    } catch (err) {
      this._content.innerHTML = prettyError(err, 'something went wrong');
    }
  }
}

declare global {
  interface HTMLElementTagNameMap {
    'app-sensor': AppSensor;
  }

  namespace JSX {
    interface IntrinsicElements {
      'app-sensor': GreyCat.Element<AppSensor>;
    }
  }
}

if (!customElements.get('app-sensor')) {
  customElements.define('app-sensor', AppSensor);
}
We are not covering all the details of how Web Components work, nor our own flavor of TSX in this tutorial. If you actually want to know more about it, please read that documentation
The interesting bit in this file is the set sensor(sensor: sensors.Sensor) setter, that actually calls the update() method, that will trigger the sampling fetch to GreyCat and update the view accordingly:
export class AppSensor extends HTMLElement {
  // ...
  async update(): Promise<void> {
    this._header.textContent = `Sensor #${this._sensor.id}`;

    try {
      // Here, we call 'nodeTime::sample()' giving our 'sensor.temperature' nodeTime
      const temperature = await core.nodeTime.sample(
        [this._sensor.temperature],
        null,
        null,
        100,
        core.SamplingMode.dense(),
        null,
        null,
      );
      // it gives us back a Table, that we can then pass to `<gui-table />`
      this._content.replaceChildren(<gui-table table={temperature} headers={['Timestamp', 'Temperature']} />);
    } catch (err) {
      this._content.innerHTML = prettyError(err, 'something went wrong');
    }
  }
}
// ...
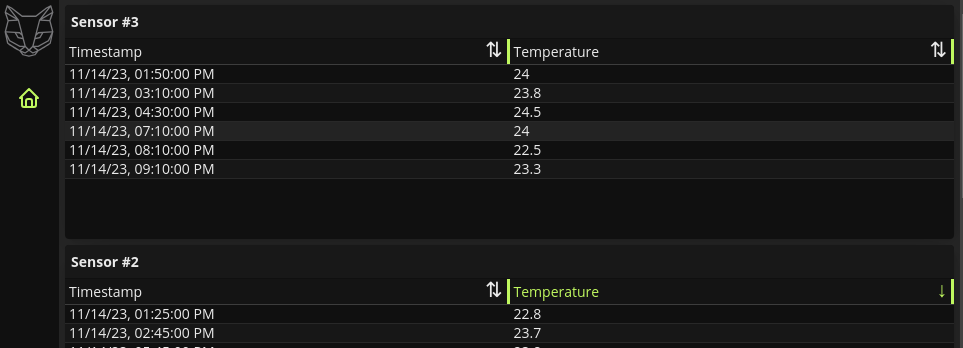
After this change, you should now see, for each sensor, a card containing the Sensor ID as title, and the temperature table for that sensor:

Create a sensor
We now want to be able to create and register our own sensors manually from the Web application.
We would first need a new @exposed function in our server for this. Lets modify project.gcl and add the following:
// in project.gcl
// ...

@expose
@write
fn createSensor(id: int, lat: float, lng: float) {
  var sensor = Sensor {
    id: id,
    location: geo::new(lat, lng),
    temperature: nodeTime<float>::new(),
    humidity: nodeTime<float>::new(),
    light: nodeTime<float>::new(),
  };
  sensors!!.set(id, sensor);
}
We add
@writeon the method because it is a function that mutates the graph.
Save the file, restart GreyCat server by hitting Ctrl+c and then run greycat serve --user=1 again.
Also, because we’ve modified our public-facing API, we need to regenerate our TypeScript bindings by running pnpm gen.
Then, we go back to our frontend, and modify frontend/pages/index/app-home.tsx to add a form for sensor creation.
By leveraging @greycat/web’s dynamic input, we can do this with little to no-code:
export class AppHome extends HTMLElement {
  async connectedCallback() {
    const createSensor = greycat.default.abi.fn_by_fqn.get('project::createSensor')!;
    const createSensorForm = new FnCallInput('create-sensor', createSensor, () => void 0);
    const callCreateSensor = () => {
      greycat.default.call('project::createSensor', createSensorForm.value);
    }

    try {
      const sensors = await project.sensors();
      this.appendChild(
        <div role="list" className="container-fluid">
          {createSensorForm.element}
          <a href="#" onclick={callCreateSensor}>Create</a>
          {sensors.map((sensor) => <app-sensor sensor={sensor} />)}
        </div>,
      );
    } catch (err) {
      console.error(err);
      this.appendChild(<>{prettyError(err, 'something went wrong')}</>);
    }
  }

  // ...
}
Here, we are leveraging FnCallInput which is able to create a Web form for any @exposed function from a GreyCat project.
Once the <a>Create</a> link is clicked, it calls our newly created function createSensor with the arguments retrieved from createSensorForm.value.
Going further
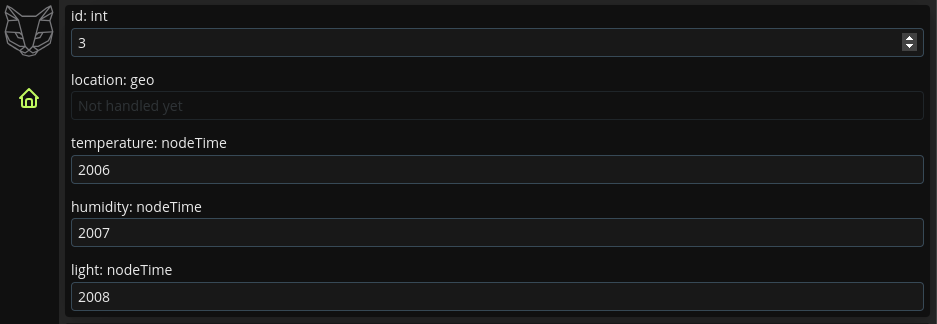
The same dynamic input logic exists for many different purpose, we also have InstanceInput which let us get a form from any instance of a GreyCat type.
So, to keep the same example, we could have an auto-generated form for our sensors with the following:
const sensorForm = new InstanceInput('sensor-form', sensors[0], (updatedSensor) => {
  // this is called every time a change is made in the generate form
  console.log('updatedSensor', updatedSensor);
});
Which would translate into this view, if added inside AppHome, even though this example is convoluted as it serve little purpose:
