In this page
Hello World
GreyCat is a stateful, graph-oriented language and runtime. It is simultaneously a programming environment and a database. This guide walks you through installation, running your first program, persisting state, and serving an HTTP API.
Prerequisites
Before starting, install GreyCat on your machine.
Hello, World
Create a directory for your project and add a project.gcl file:
fn main() {
    println("Hello, world!");
}
Run it:
greycat run
# Hello, world!
Passing arguments
Functions can accept parameters. The following function takes an optional name and falls back to "world" when none is provided:
@expose
fn hello(name: String?): String {
    return "Hello, ${name ?? "world"}!";
}
greycat run hello GreyCat
# Hello, GreyCat!
The fully qualified name of this function is
project::hello(since it lives inproject.gcl). Because there is no ambiguity (only one function namedhelloexists), GreyCat resolves the short name automatically. If two modules defined ahellofunction, you would need to use the fullmodule::helloform.
Persisting State
First, enable the src/ directory in project.gcl:
@include("src"); // add that line

fn main() {
    // ...
}
GreyCat is a database at its core. Module-level variables declared at the top level of a .gcl file, outside any function, are persisted automatically across runs.
Create src/healthcheck.gcl:
var healthchecks: nodeTime<duration>;

fn healthcheck(): duration {
    var start = time::now();
    Http {}.get("https://github.com", null);
    var elapsed = time::now() - start;
    healthchecks.setAt(start, elapsed);
    return elapsed;
}
A few things to note:
var healthchecks: nodeTime<duration>declares a module variable. Module variables must be anodeor a node collection type. They are the entry points to your persistent graph.nodeTime<duration>is a time-indexed collection. Each entry is keyed by atimeand stores adurationvalue.- The
healthcheckfunction performs an HTTP GET, measures the elapsed time, and stores the result in the time series.
Running Functions
Any function defined in any module can be invoked directly from the CLI using greycat run <module>::<function>:
greycat run healthcheck::healthcheck # 316ms30us
greycat run healthcheck::healthcheck # 307ms448us
greycat run healthcheck::healthcheck # 330ms630us
Each invocation persists a new data point in healthchecks. The state is cumulative across runs, GreyCat picks up where the previous run left off.
Scheduling Tasks
Rather than invoking healthcheck manually each time, you can schedule it to run periodically. Update main() in project.gcl:
@include("src");

fn main() {
    Scheduler::add(healthcheck, FixedPeriodicity { every: 30s }, null);
}
When GreyCat starts in serving mode, main() is called once on startup. The Scheduler::add call registers healthcheck to be executed every 30 seconds automatically.
Serving an HTTP API
Marking a function with @expose is all that is needed to make it available over HTTP. No routing configuration, no boilerplate.
Add an exposed function to src/healthcheck.gcl that computes statistics over recent healthchecks:
@expose
fn get_avg(span: duration): Gaussian<duration> {
    var now = time::now();
    var gaussian = Gaussian<duration> {};
    for (_, hc in healthchecks[now - span..now]) {
        gaussian.add(hc);
    }
    return gaussian;
}
A few things to note:
@exposemakes this function available as an HTTP endpoint. Its URL is derived from the module and function name:/healthcheck::get_avg.Gaussian<duration>is a built-in incremental statistics type that tracks count, mean, standard deviation, min, and max without storing every individual value.healthchecks[now - span..now]is a range query on thenodeTimethat iterates over all entries within the given time window.for (_, hc in ...)destructures each entry into a time key (ignored with_) and the stored duration value.
Start GreyCat in serving mode:
greycat serve --user=1
# GreyCat is serving on port: 8080
--user=1treats all incoming requests as the admin user (ID 1), which is convenient during development. See the authentication docs for production use.
Exposed functions are reachable at /<module>::<function>. Functions with parameters are called via POST, with arguments passed as a JSON array in the request body:
curl -X POST -d '[300000000]' http://localhost:8080/healthcheck::get_avg
# duration values are in microseconds: 300000000 = 5 minutes
This returns a Gaussian<duration> with the average, standard deviation, and count of healthcheck durations over the last 5 minutes:
{
    "sum": 1293657.0,
    "sumsq": 4.21301196285e11,
    "count": 4,
    "min": 287930,
    "max": 361283
}
Exploring the Graph
GreyCat provides an administration UI called the Explorer. To enable it, add the explorer library to your project.gcl:
@library("std", "...");
@library("explorer", "..."); // add that line

@include("src");

fn main() {
    println("Hello, world!");

    Scheduler::add(healthcheck, FixedPeriodicity { every: 30s }, null);
}
Then install the library and restart the server:
greycat install
greycat serve --user=1
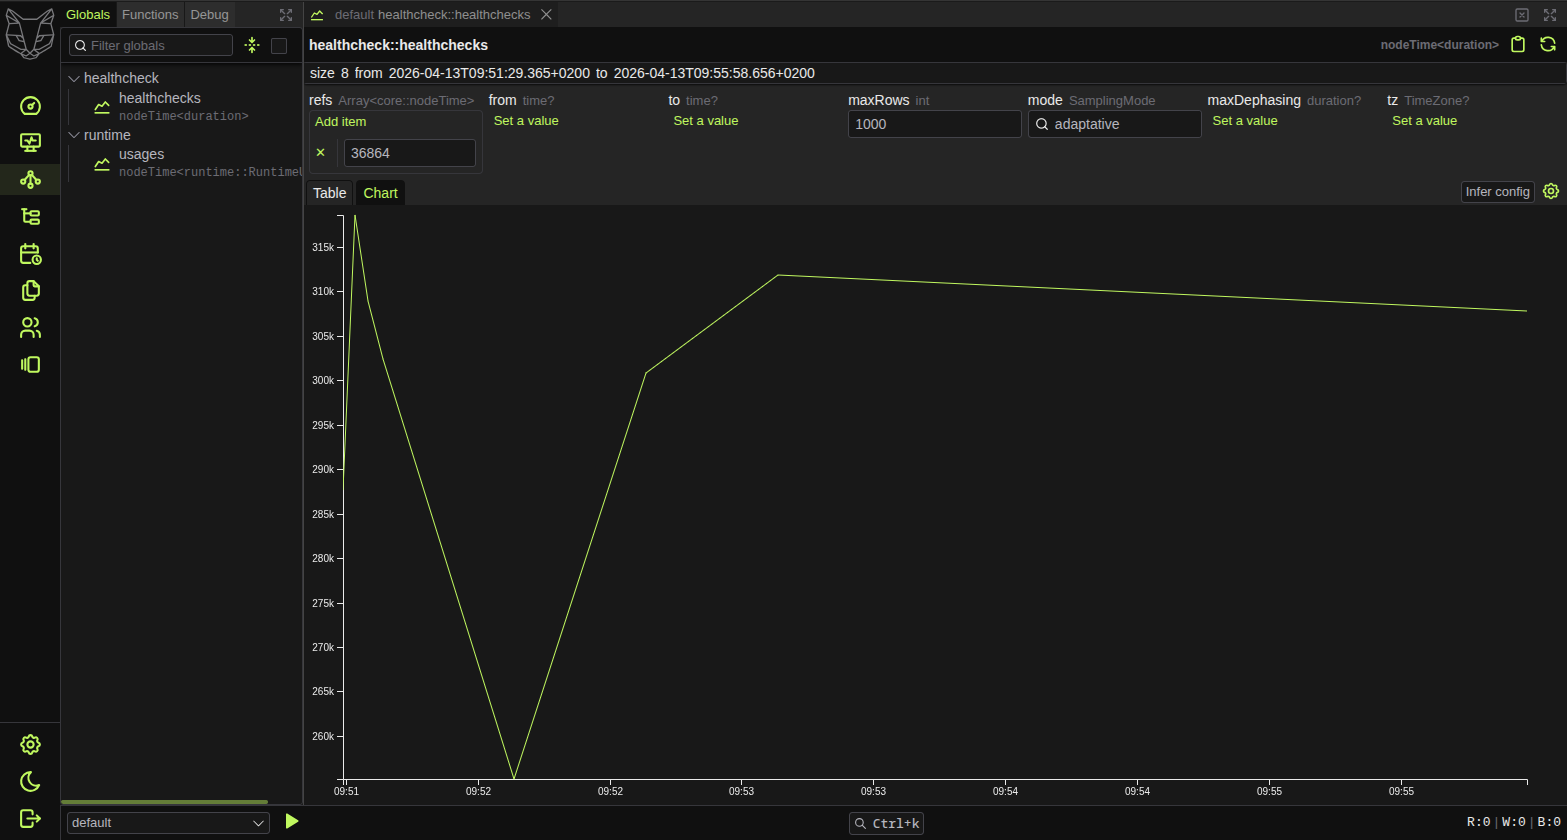
Navigate to localhost:8080/explorer/ in your browser. From the Graph tab you can browse all your module variables, find the healthcheck::healthchecks nodeTime, and visualize the data as a chart:
Building a Web UI
GreyCat ships with @greycat/web, an SDK and a Web Component library for building frontends directly on top of your exposed API.
Requirements
- Node.js >= 24
pnpm(or any Node.js package manager)- VitePlus+ CLI (
vp) - A modern browser (Chromium-based, Firefox, or Safari)
- GreyCat 7+
Scaffold a full-stack project
An official template is provided to get you started quickly:
vp create github:datathings/greycat-web-template
cd your-app-name
vp run setup
vp run setupfetches the latest GreyCat core and@greycat/webversions and updatesproject.gclandpackage.jsonautomatically. It also runspnpm installandgreycat install.
The scaffolded project includes the greycat() VitePlus+ plugin (configured in vite.config.ts), which handles multi-page app setup, relative asset URLs, and proxying API requests to the GreyCat backend. The project layout is:
.
├── src/              # GreyCat server files (.gcl)
├── app/
│   ├── index.html    # Main HTML entry point
│   └── index.tsx     # Main page script
├── public/
├── project.gcl       # GreyCat's project entrypoint (eg. main())
├── vite.config.ts
└── package.json
The template includes a minimal frontend in app/index.tsx that calls the healthcheck API and displays the result:
import '@greycat/web';
import '@greycat/web/greycat.css';

await gc.sdk.init({ debug: import.meta.env.DEV });

const healthcheck = await gc.healthcheck.get_avg(gc.core.duration.from_mins(5));

document.body.appendChild(
  <main>
    <gui-object value={healthcheck} />
  </main>,
);
The gc.healthcheck.get_avg() call is fully typed: greycat codegen ts generates TypeScript definitions from your @expose functions. The <gui-object> component renders any GreyCat value automatically.
Next steps
- GCL Syntax: familiarize yourself with the GreyCat Language syntax
- Nodes: dive deeper into GreyCat’s graph-related types
- End-to-end Tutorial: a full project with TypeScript, JSX, hot-reload, and the VitePlus+ toolchain